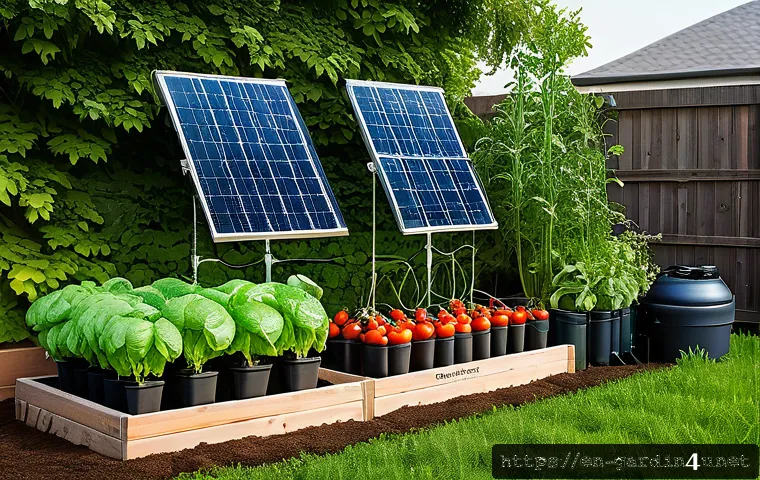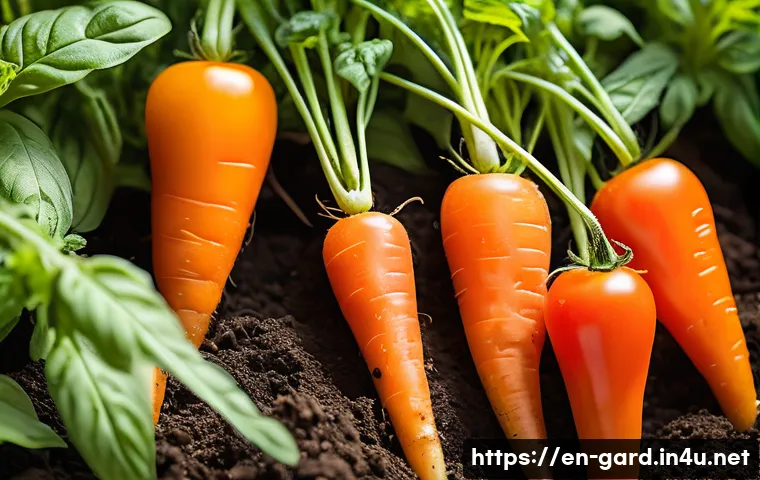
There’s absolutely nothing quite like the feeling of stepping into your garden on a sunny morning, basket in hand, and gathering a truly bountiful harvest.
That incredible sense of accomplishment, watching your hard work literally bear fruit (and veggies!), is just unmatched, isn’t it? But then, as the days start to turn a little cooler and your kitchen counters are overflowing with zucchini, tomatoes, and berries, a familiar challenge often pops up: what on earth do you do with it all?
I’ve been there countless times, staring at mountains of vibrant produce, wondering how to make that beautiful freshness last beyond a few fleeting days.
It’s a common dilemma for every home gardener, and let’s be honest, it’s a good problem to have! With grocery prices seemingly always on the rise and a growing desire for more sustainable, zero-waste living, mastering preservation isn’t just a quaint hobby anymore; it’s become a genuinely smart, economical, and incredibly satisfying skill.
From time-tested techniques passed down through generations to exciting new methods that make minimizing food waste a breeze, there’s a whole amazing world of options waiting to transform your kitchen into a year-round pantry.
Trust me, learning how to properly store and preserve your garden’s bounty can be an absolute game-changer, ensuring you enjoy those homegrown flavors long after the growing season has ended.
We’ll explore exactly how to do it, right here.
Beyond the Basics: Freezing Your Way to Freshness
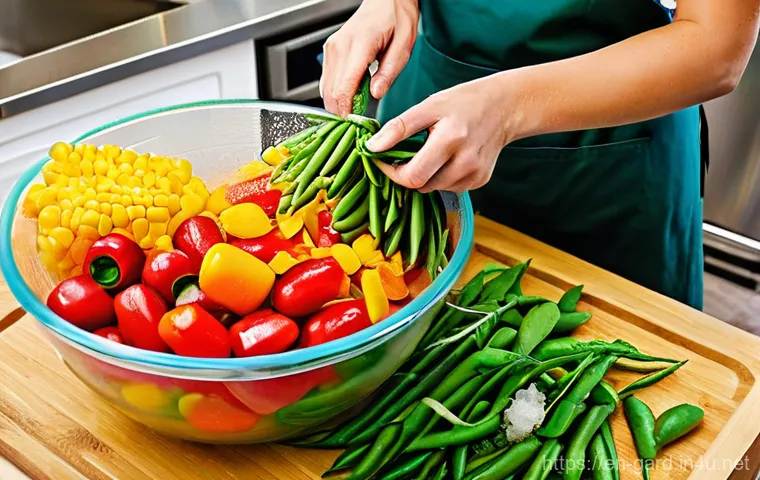
Okay, let’s be real, freezing is often the first thing that comes to mind when you’re staring down a massive zucchini haul, right? It’s deceptively simple, but there’s a real art to doing it *right* to lock in that peak garden flavor and texture. I remember one summer, I just chopped up a bunch of bell peppers and tossed them straight into the freezer bags. Big mistake! When I thawed them for a stir-fry, they were watery and mushy – totally lost that crispness. That’s when I really buckled down and learned the nuances. It’s not just about getting things cold; it’s about preparing them correctly to prevent freezer burn and maintain that vibrant taste we all work so hard for. Think about how much money you save by not having to buy out-of-season produce when your freezer is packed with homegrown goodness. Plus, there’s such a satisfying feeling, on a dreary winter day, pulling out a bag of summer berries or sweet corn and tasting sunshine again. It genuinely makes cooking easier when you have these little flavor bombs ready to go in your freezer. I’ve found that a little extra effort upfront pays dividends later in terms of quality and convenience, and it’s something I wouldn’t trade for anything.
Blanching for Best Results
This step, my friends, is a non-negotiable for most vegetables before freezing, and it’s where I personally went wrong with those bell peppers! Blanching involves a quick dip in boiling water followed by an immediate plunge into an ice bath. This process does a couple of magical things: it stops enzyme actions that cause loss of flavor, color, and texture, and it also cleanses the surface of dirt and organisms, brightens the color, and helps retain vitamins. Seriously, don’t skip it! For green beans, I usually blanch for about 3 minutes; for corn on the cob, it’s more like 7 minutes. It feels like an extra chore when you’re already swamped with harvest, but trust me, your future self will thank you when you’re enjoying vibrant, tasty veggies months later. I always have a huge pot of water boiling and a giant bowl of ice water ready when I’m processing a big batch of anything from broccoli to peas. It makes the whole operation much more efficient and helps preserve that garden-fresh goodness we all crave.
Smart Freezing Techniques
Once blanched and cooled, how you actually freeze matters. For individual pieces, like berries or chopped vegetables, I love to spread them in a single layer on a baking sheet to freeze solid before transferring them to freezer bags. This prevents them from clumping together, so you can grab just what you need without thawing the whole bag – talk about a time-saver! For purees, like pumpkin or tomato sauce, I often freeze them in ice cube trays first. Once frozen, pop out the cubes and store them in bags. This way, you have perfect portion sizes for soups, stews, or even baby food. And speaking of freezer bags, investing in good quality, thick ones is totally worth it to prevent freezer burn. I always double-bag anything with a strong odor, like onions, to keep flavors from mingling. Labeling everything with the date and contents is another habit I swear by; otherwise, you’ll be playing freezer roulette in January, and nobody wants that kind of kitchen mystery!
The Art of Canning: Jams, Pickles, and More
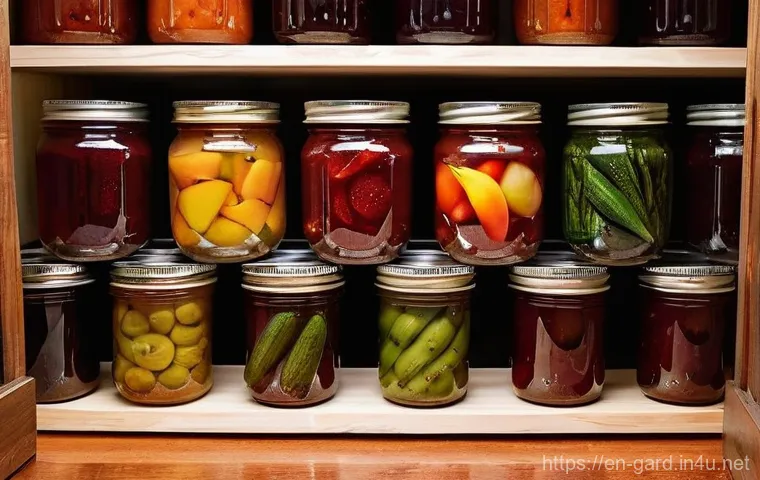
Oh, canning! It feels like stepping back in time, doesn’t it? There’s something so profoundly satisfying about seeing rows of gleaming jars on your pantry shelf, each one holding a taste of summer. It’s a bit more involved than freezing, requiring specific equipment and a solid understanding of safety protocols, but the rewards are immense. My grandma used to make the most incredible dill pickles, and for years, I was intimidated by the whole process. But once I dove in, I realized it’s less about magic and more about precision and practice. The first time I successfully sealed a jar of homemade strawberry jam, I swear I felt like a culinary superhero! It completely changed my perspective on preserving, making me feel much more connected to my food and less reliant on store-bought options. Plus, homemade gifts? Absolutely nothing beats a jar of your own crafted jelly or salsa. It’s a labor of love, for sure, but the warmth and pride it brings are truly unmatched and totally worth the effort.
Water Bath Canning Wonders
Water bath canning is your go-to for high-acid foods. Think fruits, jams, jellies, fruit butters, pickles, and tomato products (with added acid). It’s a relatively straightforward method: you process sealed jars in boiling water for a specific amount of time, creating a vacuum seal as they cool. My favorite things to water bath can are peach jam and spicy bread and butter pickles. There’s a particular kind of joy in opening a jar of vibrant peach jam in the middle of winter, the smell alone bringing back memories of warm summer days. The key here is to follow tested recipes exactly, especially regarding processing times and headspace. Don’t eyeball it! I learned that the hard way with a batch of somewhat runny apple butter. Using proper canning jars and lids is crucial, and always check for a good seal once the jars have cooled. A little ‘pop’ as they seal is one of the most satisfying sounds a home gardener can hear, almost like a little cheer from your pantry!
Pressure Canning Power
For low-acid foods – vegetables (like green beans, corn, carrots), meats, poultry, and soups – pressure canning is not just recommended, it’s essential for safety. These foods don’t have enough acid to prevent the growth of harmful bacteria, like C. botulinum, at boiling water temperatures. A pressure canner heats food to much higher temperatures, killing those dangerous spores. Now, I know the idea of a pressure canner can sound a bit daunting at first, even a little scary, but honestly, once you understand how it works and follow the instructions carefully, it’s incredibly safe and effective. My first time using one, I was definitely nervous, but I watched a ton of tutorials and read the manual cover-to-cover. Now, I regularly pressure can jars of stewed tomatoes, chicken stock, and my famous garden vegetable soup base. It’s an absolute game-changer for having nutritious, ready-to-eat meals on hand, especially during busy weekdays. Just remember to vent your canner properly and always check your gauge for accuracy – safety is paramount here!
Dehydration Delights: Snacks and Staples
Drying food might be one of the oldest preservation methods around, and for good reason: it’s incredibly space-efficient and turns your garden produce into concentrated bursts of flavor. I mean, who doesn’t love a good sun-dried tomato or some crispy apple chips? I got my first food dehydrator a few years ago, and it quickly became one of my most-used kitchen gadgets during harvest season. It’s amazing how much you can shrink down, say, a giant pile of kale into a few jars of crunchy chips or a handful of powder for smoothies. Beyond snacks, dried herbs retain their potency beautifully, and dried mushrooms add an incredible umami depth to winter stews. It’s a fantastic way to capture the essence of your garden in a form that takes up minimal pantry space and doesn’t require refrigeration. I’ve found myself experimenting with all sorts of things, from thinly sliced zucchini chips to bell pepper flakes, and the results are consistently delicious and surprisingly versatile. It’s a game-changer for those of us who hate wasting even a single harvest item!
Sun Drying vs. Dehydrator
You’ve got a couple of options when it comes to drying. Sun drying is totally old-school and wonderfully energy-efficient if you live in a hot, dry climate. I’ve tried it with tomatoes and herbs on a really hot, low-humidity week, and it worked like a charm, infusing them with that intense, concentrated flavor. However, it requires consistent good weather and protection from pests and dew. For most of us, a food dehydrator is the more reliable and practical choice. It provides controlled heat and airflow, making the process much faster and less dependent on the whims of Mother Nature. Plus, you can run it indoors, keeping those flying visitors out of your food. I use mine almost constantly during peak harvest, drying everything from slices of zucchini for “zucchini jerky” to finely chopped carrots and celery for my homemade soup mix. It takes out all the guesswork and delivers perfectly dried produce every single time, without fail.
Transforming Fruits and Veggies
The possibilities with dehydration are truly endless! For fruits, think chewy apple rings, banana chips, or even homemade fruit leathers (a huge hit with my nieces and nephews!). Just slice them thin, arrange them on the dehydrator trays, and let the magic happen. For veggies, beyond the classics like sun-dried tomatoes (which you can totally make in a dehydrator too!), I love making crispy kale chips seasoned with a little nutritional yeast, or drying thin slices of sweet potatoes for a healthy snack. You can also dry corn kernels, peas, and even green beans to rehydrate for soups and stews later. One of my favorite things is to dry a mix of garden vegetables, then powder them in a blender. This ‘garden powder’ is fantastic for boosting the nutrition and flavor of sauces, soups, and casseroles all winter long. It’s an easy way to sneak more veggies into your family’s diet without them even realizing it, which is a win in my book!
Fermentation Fun: Probiotics from Your Garden
Now, if you want to talk about truly transforming your harvest and adding a powerhouse of gut-healthy goodness to your diet, let’s chat about fermentation! This method uses beneficial microbes to convert sugars into acids, gases, or alcohol, resulting in incredible flavors and extended shelf life. It sounds a bit sci-fi, perhaps, but it’s a centuries-old practice that’s experiencing a huge resurgence, and for good reason! My first foray into fermentation was a simple batch of sauerkraut from some very abundant cabbage heads. I was so nervous, imagining all sorts of nasty things growing, but a few weeks later, I tasted the most tangy, crisp, and incredibly delicious kraut I’d ever had. It was a revelation! Now, my fridge always has a jar of something bubbling away, whether it’s kimchi, lacto-fermented pickles, or even homemade hot sauce. It’s a vibrant, living form of preservation that constantly surprises me with its depth of flavor and health benefits. Plus, it’s a pretty low-cost way to make your produce last, making it both economical and incredibly tasty!
Kimchi, Sauerkraut, and Beyond
These are the absolute superstars of fermented vegetables, and both are surprisingly easy to make at home. For sauerkraut, all you really need is cabbage, salt, and a jar. The natural bacteria on the cabbage do all the work! Kimchi involves a few more ingredients – chili powder, garlic, ginger, and usually radishes or other veggies – but the process of lacto-fermentation is similar. I’ve experimented with different vegetables, too. Fermented carrots make a fantastic tangy snack, and fermented green beans are a delightful twist on a traditional pickle. The key is maintaining an anaerobic environment (no oxygen) and using the right amount of salt. There are tons of great resources and starter kits out there if you’re feeling a bit intimidated, but I honestly started with just a few basic kitchen tools. The flavors you can achieve are so complex and unique; you’ll wonder why you ever bought these from the store. And don’t forget the amazing probiotic benefits – it’s like a natural supplement straight from your garden!
Vinegar and Kombucha: Liquid Gold
Beyond solid ferments, there’s a whole world of fermented beverages and condiments waiting to be explored. Making your own fruit vinegars from overripe berries or apple scraps is incredibly rewarding and gives you a much richer, more nuanced flavor than store-bought options. I love making raspberry vinegar to use in salad dressings or for a refreshing shrub drink. And then there’s kombucha! If you’ve got a sweet tooth and a passion for gut health, brewing your own fizzy, tangy tea is an absolute blast. You’ll need a SCOBY (Symbiotic Culture Of Bacteria and Yeast) and some basic tea and sugar, but once you get going, it’s a continuous ferment that keeps giving. I started with a friend’s extra SCOBY, and now I have a continuous brew going that I flavor with everything from garden mint to peach slices. It’s a fantastic way to utilize fruit that might be a little too soft for eating fresh, turning it into a delicious, healthy drink that feels like a real treat.
Root Cellar Revival: Old School Storage for the Modern Gardener
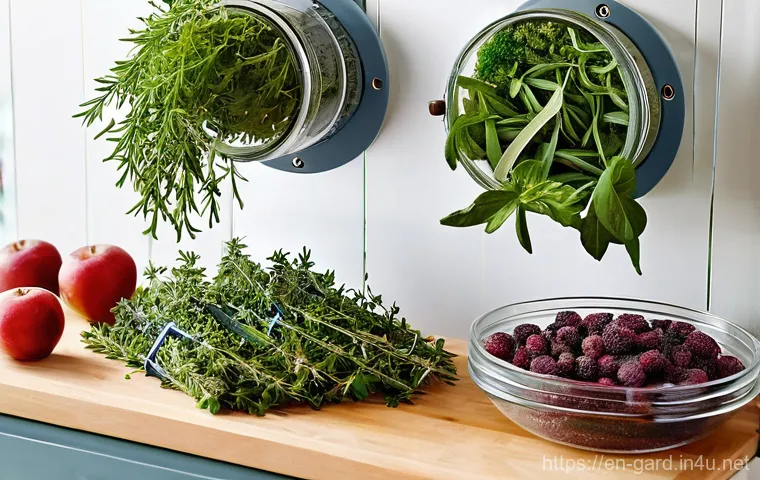
Before refrigerators and freezers were commonplace, our ancestors relied on ingenious methods like root cellars to keep their harvest fresh through the winter. And guess what? These old-school techniques are still incredibly effective and, frankly, pretty cool! If you have a cool, dark, and humid space – think an unheated basement corner, a well-insulated shed, or even a buried garbage can – you might be able to create your own modern root cellar. I don’t have a traditional underground cellar, but I’ve successfully stored potatoes and carrots for months in a cool, damp corner of my unfinished basement. The key is finding that sweet spot of temperature and humidity that mimics the earth itself. It’s a truly sustainable, low-energy way to preserve certain crops, and there’s something wonderfully satisfying about reaching for a perfectly firm potato in February that came straight from your garden back in October. It makes you feel so self-sufficient and connected to the past!
Ideal Conditions for Long-Term Storage
The perfect root cellar environment is generally cool (around 35-50°F or 2-10°C) and humid (85-95% humidity), with good air circulation and complete darkness. These conditions slow down respiration and ripening, preventing spoilage and sprouting. For my basement setup, I use some simple shelving and store certain crops in damp sand or sawdust to maintain humidity. Good air circulation is vital to prevent mold and mildew, so don’t just pile everything up! I learned that lesson when a batch of apples went bad prematurely because they couldn’t breathe. Some people even create makeshift root cellars by burying large, watertight containers in the ground. It’s all about mimicking Mother Nature’s cool, steady embrace. Monitoring temperature and humidity, perhaps with a simple thermometer/hygrometer, can help you fine-tune your space to be absolutely perfect for your stored produce and ensure maximum longevity.
Best Crops for Cold Storage
Not all produce is created equal when it comes to root cellar storage. Root vegetables like carrots, beets, parsnips, and potatoes are absolute champions, loving those cool, damp conditions. Onions and garlic also store well, but they prefer a slightly drier environment. Winter squash and pumpkins thrive in cool, dry conditions, making a slightly different spot ideal for them. Apples and pears can also be stored this way, but be careful – apples can emit ethylene gas, which can cause other produce (like potatoes) to sprout prematurely, so store them separately! I’ve had incredible success with storing my ‘storage’ varieties of apples well into spring, which is amazing for pies and sauces. Always make sure the produce you’re storing is mature, undamaged, and free of disease. A single bruised potato can spoil the whole bin, so be selective and only store the best of your harvest!
Quick & Easy Preserves: Short-Term Solutions
Sometimes, you just need a quick fix, something that extends the life of your bounty for a week or two without requiring a full-blown canning session or a trip to the freezer. These are my go-to methods for when I have a smaller harvest, or I just want to enjoy something fresh for a little longer. These quick preservation techniques are fantastic for weeknight meals or for when you just can’t face another long kitchen project. I’ve found that even a few extra days of freshness can make all the difference, preventing waste and ensuring those beautiful flavors don’t go to ruin. Plus, many of these methods are incredibly simple and don’t require any special equipment beyond what you likely already have in your kitchen. They’re perfect for dipping your toes into the world of preservation without feeling overwhelmed, and the results are often just as delicious as their long-term counterparts. It’s all about making the most of every single leaf and fruit from your garden, even the smallest bits!
Refrigerator Pickles and Jams
If the idea of canning feels like too big a leap, refrigerator pickles are your new best friend! You simply make a brine (vinegar, water, salt, sugar, spices), pour it over your prepared vegetables (cucumbers, green beans, carrots, radishes – you name it!), and store them in the fridge. They’ll be ready to eat in a few days and last for several weeks. The same goes for refrigerator jams: cook down your fruit with sugar and maybe a little pectin, then store it in clean jars in the fridge. These aren’t shelf-stable like canned goods, but they are incredibly delicious and perfect for enjoying fresh produce for a little longer without all the fuss of processing. My absolute favorite is a quick pickled red onion – it elevates almost any dish, from tacos to salads, and takes less than 15 minutes to put together. It’s a lifesaver when you have a surplus of certain veggies and want to give them a delicious new lease on life!
Infused Oils and Vinegars
Another fantastic way to capture the essence of your garden is by making infused oils and vinegars. Imagine a vibrant basil-infused olive oil for your caprese salad, or a zesty lemon verbena vinegar for your next vinaigrette. It’s super simple! For oils, just gently warm your herbs (like rosemary, thyme, or oregano) in a good quality olive oil or grapeseed oil, then let it steep for a week or two before straining. For vinegars, simply add fresh herbs, garlic, or even fruit to a bottle of good quality apple cider vinegar or white wine vinegar and let it infuse. Just be mindful of safety with infused oils, especially those with fresh garlic or herbs, as they can be a risk for botulism if not stored properly (always refrigerate and use within a week or two, or use dried ingredients for longer storage). I personally love to make a chili-infused olive oil with my extra hot peppers – it adds a fantastic kick to everything and truly brightens up a simple meal!
Herbs and Oils: Infusions for Flavor
When it comes to stretching your garden’s flavor profile, don’t forget about your herbs! They might seem small compared to a bushel of tomatoes, but their impact on your cooking is huge. Preserving herbs means you can enjoy that fresh burst of flavor year-round, elevating everything from weeknight dinners to special occasion meals. I used to just let my herb garden go wild at the end of the season, and then felt so sad when the first frost hit. Now, I have a dedicated ‘herb day’ where I harvest and process everything I can, ensuring I have a steady supply of my favorites. There’s something incredibly comforting about reaching into the pantry and pulling out a jar of dried oregano that you grew yourself, or grabbing a cube of frozen pesto. It feels like extending the growing season indefinitely, doesn’t it? It’s a subtle but incredibly powerful way to keep those garden vibes alive in your kitchen, no matter the season.
Herb Drying and Freezing Methods
Drying herbs is perhaps the simplest way to preserve them. You can hang bundles of herbs like rosemary, thyme, or oregano upside down in a cool, dark, well-ventilated space. Alternatively, a dehydrator works wonders for quicker drying, especially for leafy herbs like basil and mint, which can sometimes mold if air-dried too slowly. For freezing, many herbs retain their fresh flavor much better. I love making pesto with my abundant basil and freezing it in ice cube trays – perfect for a quick pasta sauce! Another favorite trick is to chop up herbs like parsley, cilantro, or chives and pack them into ice cube trays, then cover with a little olive oil or water and freeze. These herb cubes are fantastic for tossing directly into soups, stews, or sautéed vegetables, instantly adding that fresh-from-the-garden flavor. It’s such a simple trick, but it saves so much time and prevents waste, making your cooking much more efficient.
Making Your Own Herbal Oils and Vinegars
Infusing oils and vinegars with your garden herbs is another elegant way to capture their essence. Imagine a delicate lavender-infused olive oil for baking or a robust rosemary-garlic oil for dipping bread. The process is pretty straightforward. For oils, fill a clean, dry jar with your chosen herbs (ensure they are completely dry to prevent spoilage!), then cover them with a good quality oil like olive oil or avocado oil. Let it sit in a cool, dark place for a few weeks, shaking occasionally, then strain out the herbs. The result is a beautifully flavored oil perfect for dressings, marinades, or cooking. Similarly, vinegars can be infused with herbs, spices, or even fruit. A tarragon-infused white wine vinegar is sublime for making Béarnaise sauce or a simple vinaigrette. Just remember the crucial safety note for fresh herb oils – if you include fresh garlic or other low-acid ingredients, always refrigerate and use quickly, or blanch the herbs first to reduce moisture and spore count for longer, shelf-stable infusions. I often stick to dried herbs for my longer-term oil infusions to be extra cautious and safe!
| Preservation Method | Best For | Key Benefits | My Personal Tip |
|---|---|---|---|
| Freezing | Berries, corn, green beans, peas, purees | Retains color/nutrients, relatively easy, good for large batches | Blanch most veggies first! Freeze flat on trays before bagging to prevent clumps. |
| Water Bath Canning | Jams, jellies, pickles, fruit sauces, high-acid tomatoes | Shelf-stable, beautiful presentation, great for gifts | Always follow tested recipes exactly; check seals after 24 hours. |
| Pressure Canning | Green beans, corn, potatoes, meats, soups, low-acid foods | Essential for low-acid safety, shelf-stable, convenient meal starters | Read your canner manual thoroughly; vent properly before processing. |
| Dehydrating | Fruits (chips, leathers), herbs, root veggies, mushrooms | Space-saving, intensifies flavor, great for snacks and pantry staples | Slice items uniformly thin for even drying. Use a dehydrator for reliability. |
| Fermentation | Cabbage, cucumbers, carrots, hot peppers (kimchi, sauerkraut, pickles) | Adds probiotics, unique tangy flavors, low-energy method | Invest in airlocks for peace of mind, and experiment with spices! |
| Root Cellaring | Potatoes, carrots, beets, winter squash, onions | No energy needed, extends life of sturdy crops, traditional method | Check produce regularly for spoilage; store apples away from other veggies. |
Wrapping Things Up
Whew! We’ve covered a lot of ground today, haven’t we? From the frosty wonders of your freezer to the bubbling magic of fermentation, and even the timeless wisdom of a root cellar, there’s a whole universe of food preservation waiting for you to explore. My own journey into this world started with a desire to cut down on food waste and savor my garden’s bounty a little longer, but it quickly became so much more. It’s truly a connection to the seasons, a way to feel self-sufficient, and honestly, a huge money-saver when you think about avoiding those pricey out-of-season produce items. Each method has its own charm and benefits, and I genuinely believe there’s something for everyone, regardless of your space or experience level. Don’t feel like you need to master everything at once. Pick one method that excites you, try a small batch, and celebrate every little success. You’ll be amazed at the pride and satisfaction that comes from opening a jar of your own homemade jam or pulling out perfectly preserved veggies from the freezer on a cold winter day. It’s not just about preserving food; it’s about preserving joy, flavor, and a bit of summer sunshine for later! Seriously, give it a go; your taste buds (and your wallet!) will thank you.
Handy Tips You’ll Wish You Knew Sooner
When you’re diving into the wonderful world of food preservation, a few smart habits can make all the difference, trust me! I’ve learned these the hard way, so you don’t have to.
1. Always prioritize safety. This isn’t just a suggestion, it’s paramount! Especially with canning, strictly follow tested, reliable recipes from reputable sources like university extensions or well-known canning guides. Don’t freestyle with processing times or ingredients, as improper methods can lead to serious health risks. Double-check your seals and always use proper equipment for the job. It’s better to be overly cautious than to regret it later.
2. Start small, especially if you’re new to a method. Instead of tackling a huge batch of tomatoes for canning on your first try, maybe preserve a few pounds. This allows you to get comfortable with the process, troubleshoot any issues, and build confidence without feeling overwhelmed. It’s a journey, not a sprint, and small successes lead to bigger, more ambitious projects down the line. Plus, it’s less daunting for your first go!
3. Label absolutely everything with the contents and the date. You might think you’ll remember what’s what, but after a few weeks or months, every frozen bag of green stuff starts to look identical. Trust me, I’ve played “freezer roulette” one too many times. A simple permanent marker and a clear label can save you so much frustration and ensure you’re using your oldest preserved goods first, minimizing waste.
4. Invest in good quality equipment where it matters. While you can certainly start with basics, good quality freezer bags, canning jars, or a reliable dehydrator can significantly improve your results and make the process smoother. For instance, heavy-duty freezer bags dramatically reduce the risk of freezer burn, protecting your hard work. A good pressure canner is also a critical investment for safety and effectiveness with low-acid foods.
5. Don’t be afraid to experiment and get creative once you’ve got the basics down. Once you’re comfortable with the core techniques, start playing with different spice blends for your pickles, unique fruit combinations for jams, or new vegetables for fermenting. That’s where the real fun begins, and you’ll discover your own signature flavors that are truly one-of-a-kind. It turns preservation from a chore into a delightful culinary adventure!
Key Takeaways for Your Preservation Journey
So, what’s the big takeaway from all this talk about keeping our garden’s treasures fresh? It’s pretty simple: embracing food preservation opens up a world of culinary possibilities and genuine satisfaction. Firstly, remember that diversity is key; there’s no single “best” method. Freezing is fantastic for convenience and retaining nutrients, canning offers incredible shelf-stability and homemade gifts, while dehydration concentrates flavors and saves space. Then, we have the ancient art of fermentation, bringing incredible gut-healthy benefits and unique tang to your table, and the quiet efficiency of root cellaring, connecting us to traditional, low-energy storage. Each method has its ideal candidates and its own set of rules, particularly around safety, so always pay attention to the specific guidelines for what you’re preserving.
Secondly, and I can’t stress this enough, safety first, always! Whether it’s adhering strictly to tested canning recipes, ensuring proper temperatures for dehydration, or maintaining anaerobic conditions for fermentation, understanding and respecting the science behind these processes is crucial for enjoying safe, delicious food. And finally, approach it all with an open mind and a sense of adventure! This isn’t just about stockpiling food; it’s about connecting with your harvest, reducing waste, saving money, and enjoying the freshest flavors all year long. The joy of opening a jar of homemade salsa in January, made from your summer tomatoes, is truly unmatched. It’s a skill that empowers you in the kitchen and gives you a deeper appreciation for the food on your plate. So, roll up your sleeves, pick a method, and start preserving your way to a more flavorful and sustainable lifestyle!
Frequently Asked Questions (FAQ) 📖
Q: I’ve just started gardening, and my kitchen is already overflowing! Where on earth should a beginner like me even begin with preserving this beautiful bounty? What are the absolute easiest methods to get started without feeling overwhelmed?
A: Oh, I totally get that feeling! It’s such a wonderful problem to have, isn’t it? When my garden first started giving me more than I could eat, I felt a bit lost too.
But trust me, there are some incredibly straightforward ways to dive into preservation that don’t require fancy equipment or a chemistry degree! My go-to recommendation for beginners is always freezing and simple dehydrating.
Freezing is an absolute lifesaver. You barely need anything special – just freezer-safe bags or containers. For most fruits like berries, you just wash them, let them dry, and pop them into the freezer.
For veggies like green beans or corn, a quick blanch (a super quick dip in boiling water, then an ice bath) helps them keep their vibrant color and nutrients, then you just freeze them flat on a tray before bagging.
It’s truly a “set it and forget it” method that keeps that fresh-from-the-garden flavor wonderfully intact. Dehydrating is another fantastic, low-effort option, especially for herbs, apple slices, or even making your own tomato powder.
You can use a dedicated dehydrator, or even your oven on its lowest setting with the door cracked. It shrinks everything down, making it super space-efficient, and creates amazing concentrated flavors.
Honestly, just picking one or two methods to start with will make a huge difference in enjoying your harvest year-round!
Q: I’m all for preserving my own food, but honestly, food safety makes me a little nervous. What are the most critical food safety tips I need to follow to make sure everything I preserve is safe and healthy for my family?
A: You are absolutely right to prioritize food safety, and it’s fantastic that you’re thinking about it! It’s one of those things that, once you learn the basics, becomes second nature.
For me, the number one rule across the board is cleanliness. Always start with thoroughly washed hands, clean counters, and sterilized jars and equipment, especially if you’re venturing into canning.
A huge mistake I learned early on was washing root vegetables like carrots or potatoes before storing them for the long term – that extra moisture can actually encourage mold!
Instead, just brush off any loose dirt and store them unwashed in a cool, dark place. For anything going into a canner, you must follow tested, reliable recipes from trusted sources.
Don’t eyeball ingredients or alter proportions, especially with acidity levels. Botulism is a serious concern with improperly canned low-acid foods, so adhering to guidelines, like ensuring enough lemon juice in tomato products, is paramount for safety.
And remember to properly cool any food before freezing to avoid temperature danger zones. Always keep an eye out for any signs of spoilage like off-smells, mold, or bulging lids – when in doubt, throw it out.
It’s always better to be safe than sorry!
Q: It’s not just about making my harvest last; I want it to taste as good as possible, too! How can I preserve my fruits and vegetables in a way that truly locks in their fresh flavor and nutrients for later?
A: This is such a great question, because what’s the point of all that effort if it doesn’t taste amazing later, right? I’ve found that the secret really lies in a few key practices.
First off, timing is everything. Harvest your produce at its absolute peak ripeness – not too early, not too late – because that’s when its flavor and nutritional content are at their best.
For vegetables you plan to freeze, don’t skip the blanching step! I know it adds an extra minute, but it makes an incredible difference. Blanching inactivates enzymes that can degrade flavor, color, and nutrients over time in the freezer, preventing that sad, dull look and taste.
For dehydrated items, like herbs or fruits, make sure they are thoroughly dry and then stored in airtight containers away from light and heat to prevent nutrient loss and maintain flavor.
For canning, while the heat process will change the texture a bit, using fresh, high-quality ingredients and the right balance of acidic ingredients (for fruits and pickles) helps retain a surprising amount of zing.
And always, always use appropriate storage containers. Glass jars and vacuum-sealed bags do wonders to protect against freezer burn and oxidation, which can really rob your food of its vibrant taste and essential vitamins.
It’s all about giving that garden-fresh goodness the best chance to shine, even months down the line!