Hey there, amazing gardeners! After a season of joyfully harvesting all those incredible vegetables from your backyard, have you ever noticed your garden beds looking a little… depleted?
I know I have, many times! It’s a classic moment for us home growers, realizing that every juicy tomato and crunchy cucumber takes a significant toll on our precious soil.
We give our plants so much love and attention, sometimes forgetting that the real magic starts beneath the surface. Through years of tending my own patch, I’ve discovered just how crucial it is to replenish and revitalize our soil, ensuring it’s ready to support bountiful harvests for years to come.
Skipping this vital step can lead to lackluster growth and disappointing yields, which is the last thing any passionate gardener wants! Modern gardening really emphasizes a holistic approach, embracing regenerative practices to keep our earth vibrant.
Curious about the best ways to bring your garden soil back to its prime? Let’s explore exactly how you can do it to ensure your next growing season is the best one yet!
Decoding Your Garden’s Post-Harvest SOS
Okay, so you’ve just pulled out that last zucchini or harvested your final batch of kale, and suddenly your garden bed looks a bit… tired, right? I totally get it.
After a season of tirelessly producing all those delicious veggies, your soil has worked incredibly hard, and it’s basically sending out an SOS. Just like we need to refuel after a good workout, our garden soil needs a serious replenishment of nutrients and organic matter.
Ignoring these silent pleas is a common mistake I made when I first started gardening, and trust me, the subsequent seasons were always a bit of a letdown.
I’ve learned firsthand that neglecting this crucial step can lead to lackluster growth, diminished yields, and even make your plants more susceptible to pests and diseases.
It’s like trying to run a marathon on an empty stomach! We’re essentially borrowing nutrients from the soil, and a responsible gardener always pays them back.
Understanding what your soil has given up is the first step in restoring it, preparing it for future bounties, and ensuring its long-term vitality.
Understanding Nutrient Depletion
Every single fruit, vegetable, and herb you harvest pulls a specific cocktail of nutrients from the soil. Those juicy tomatoes are packed with potassium, and your leafy greens are absolute nitrogen sponges.
Over a growing season, especially with heavy feeders, your soil’s reserves of essential macronutrients like nitrogen, phosphorus, and potassium (NPK), as well as vital micronutrients, can get seriously depleted.
I remember one year, after an amazing potato harvest, my subsequent bean crop was incredibly stunted. It hit me then – the potatoes had taken so much, and I hadn’t given anything back!
This ongoing extraction without replenishment creates an imbalance, which impacts everything from plant vigor to the flavor of your produce.
The Importance of Soil Structure
Beyond just nutrients, continuous cultivation, watering, and even walking on your garden beds can compact the soil, breaking down its delicate structure.
A healthy soil structure is like a sponge, full of tiny air pockets that allow roots to breathe, water to drain properly, and beneficial microorganisms to thrive.
When it gets compacted, these air pockets disappear, leading to poor drainage, struggling roots, and an unhappy microbial community. I once had a patch where the water just sat on top after a rain, and that’s when I knew my soil structure was crying out for help.
Restoring that airy, crumbly texture is just as vital as adding nutrients.
Compost: Your Garden’s Liquid Gold
If there’s one secret weapon every gardener should wield, it’s compost. Seriously, this stuff is magic! I still remember the first time I started my own compost pile.
It felt a little intimidating at first, but seeing kitchen scraps and garden waste transform into rich, dark, earthy-smelling goodness was incredibly satisfying.
It’s not just about adding nutrients; compost is the ultimate soil builder. It improves soil structure, enhances water retention, and provides a feast for all those microscopic critters that keep your soil healthy.
Every autumn, after clearing out my beds, spreading a generous layer of homemade compost is one of my most cherished garden rituals. It’s like giving my garden a warm, cozy blanket for the winter, packed with all the good stuff it needs to wake up vibrant and ready in the spring.
Making Your Own Black Gold
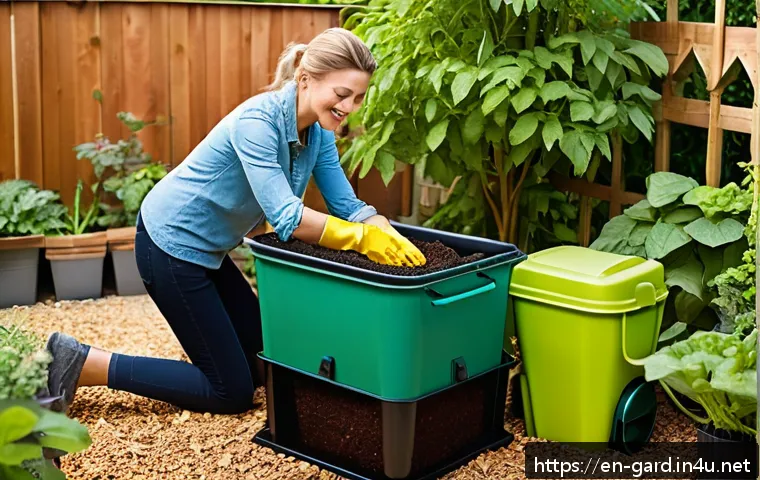
Creating your own compost is surprisingly simple and incredibly rewarding. You just need a good mix of “greens” (nitrogen-rich materials like kitchen scraps, grass clippings) and “browns” (carbon-rich materials like dried leaves, shredded paper, wood chips).
I usually aim for about a 50/50 mix, turning my pile regularly to aerate it and speed up decomposition. It’s amazing how quickly a mountain of kitchen waste can break down into nutrient-dense compost.
Plus, it significantly reduces your household waste, which feels pretty good, too! Don’t be afraid to experiment; you’ll quickly get a feel for what works best in your climate and with your available materials.
Buying Quality Compost
If making your own isn’t feasible, don’t fret! You can absolutely buy excellent quality compost from your local garden center or nursery. Look for certified organic options if possible, and don’t be shy about asking questions about its source and ingredients.
I’ve found that a good quality mushroom compost or a well-aged animal manure compost can do wonders. Just be mindful of fresh manures, as they can be too “hot” and burn plant roots; always opt for well-composted versions.
A healthy, active compost will have a pleasant earthy smell, not a pungent or foul odor.
Cover Crops: Nature’s Green Blanket
Oh, cover crops! These unsung heroes have completely transformed my approach to fall and winter gardening. For years, after harvesting, I’d just leave my beds bare, thinking they needed a rest.
Big mistake! Bare soil is vulnerable soil. It’s exposed to harsh weather, susceptible to erosion, and its precious microbial life can dwindle.
That’s when I discovered the magic of cover crops. Planting these “green manures” after your main harvest is like giving your soil a warm, protective hug.
They prevent erosion, suppress weeds, add organic matter when tilled in, and some even fix nitrogen from the air, enriching your soil without you lifting a finger.
It’s truly nature’s way of rejuvenating the earth, and I’m always amazed at how much better my spring garden performs after a season of cover cropping.
Choosing the Right Cover Crop for Your Needs
The world of cover crops is wonderfully diverse, and there’s a perfect match for almost every gardening goal. For nitrogen fixation, clovers, vetch, or Austrian winter peas are fantastic legumes that actually pull nitrogen from the atmosphere and make it available to your subsequent crops.
If you’re looking to add a massive amount of organic matter and break up compacted soil, cereal rye or oats are excellent choices with their extensive root systems.
I often use a mix, like a blend of clover and rye, to get the best of both worlds. Consider your local climate and planting times – some cover crops are better for overwintering, while others perform best as a quick summer “fallow” crop.
Integrating Cover Crops into Your Rotation
The key to successful cover cropping is timing. Ideally, you want to plant them as soon as your main harvest is complete, while the soil is still warm enough for germination.
In spring, you’ll either “chop and drop” them (cutting them down and leaving them on the soil surface to decompose) or lightly till them into the soil a few weeks before you plan to plant your next crops.
I prefer the “chop and drop” method for minimum disturbance and maximum organic matter benefit. It takes a little planning, but the payoff in healthier, more vibrant soil is absolutely worth the effort.
Smart Crop Rotation for Long-Term Fertility
Now, this one might sound a bit academic, but trust me, understanding crop rotation has been a game-changer for my garden’s health and overall productivity.
For years, I just planted my tomatoes in the same spot every year because they did so well there. But eventually, I noticed diseases cropping up more often and yields slowly declining.
That’s when I really dug into the concept of crop rotation. It’s essentially the practice of planting different types of crops in different areas of your garden each season.
This simple act prevents the buildup of specific pests and diseases that are particular to certain plant families, and it also helps to balance nutrient uptake, ensuring no single area gets completely drained of specific elements.
It’s like giving your soil a varied diet, preventing fatigue and maintaining robust health.
The Four-Family Rotation Principle
A common and effective way to practice crop rotation is to divide your garden into sections and rotate crops based on four main plant families:
- Legumes (beans, peas): These are nitrogen-fixers, enriching the soil.
- Leafy Greens (lettuce, spinach, cabbage): Heavy nitrogen feeders.
- Fruiting Vegetables (tomatoes, peppers, squash): Require balanced nutrients.
- Root Vegetables (carrots, potatoes, beets): Tend to be heavy potassium feeders.
I usually sketch out my garden plan at the end of each season, mapping where everything grew, and then plan my rotations for the next year. It sounds like a lot of work, but once you get the hang of it, it becomes second nature and hugely beneficial.
Benefits Beyond Disease Prevention
Beyond just keeping pests and diseases at bay, rotating your crops helps manage soil fertility more efficiently. For instance, planting nitrogen-fixing legumes in a bed that previously grew nitrogen-hungry leafy greens helps replenish what was taken out.
Then, following that with a fruiting vegetable that benefits from the added nitrogen works perfectly. This thoughtful cycle reduces your reliance on external fertilizers and builds a self-sustaining ecosystem right in your backyard.
I’ve personally seen a dramatic reduction in common issues like blight on my tomatoes and less clubroot in my brassicas since I started faithfully rotating.
The Essential Role of Mulch: Your Soil’s Protective Blanket
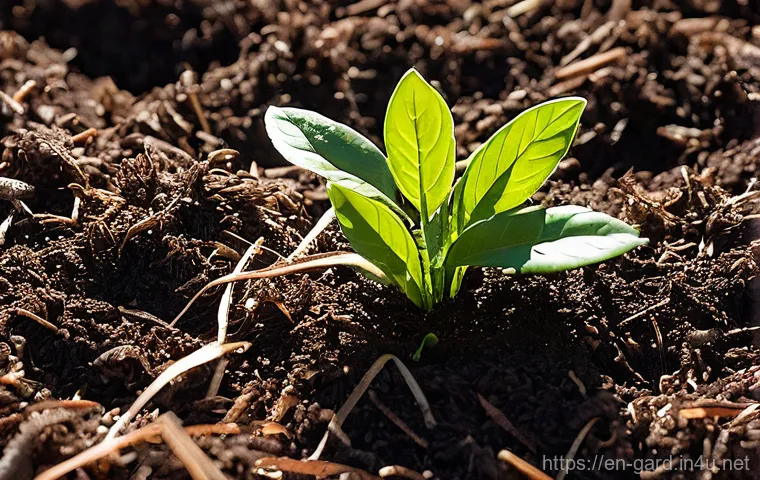
Let me tell you, if there’s one thing that transformed my garden from “okay” to “thriving,” it’s consistent mulching. For years, I saw mulch as purely decorative, or maybe just a weed suppressor.
But oh, how wrong I was! Mulch is truly an unsung hero, a protective blanket for your soil that works tirelessly behind the scenes. Spreading a good layer of organic mulch, like straw, wood chips, or shredded leaves, does so many incredible things.
It conserves soil moisture, meaning I water less (which is a huge win, especially during hot summers!). It suppresses those pesky weeds, saving my back from endless weeding sessions.
But most importantly, it moderates soil temperature, keeping roots cool in the summer and warmer in the winter, and as it breaks down, it slowly but surely adds precious organic matter back into the soil.
Choosing the Best Mulch for Your Garden
The type of mulch you choose really depends on your goals and what’s readily available. For my vegetable beds, I often swear by straw (not hay, which can contain weed seeds!).
It’s light, breaks down nicely, and doesn’t tie up nitrogen as much as woodier mulches can. For perennial beds and paths, wood chips are fantastic – they last longer and look quite attractive.
Shredded leaves, especially oak leaves, are another favorite of mine, providing excellent nutrients as they decompose. I’ve even used grass clippings in a pinch, but you have to be careful to apply them in thin layers to prevent matting and ensure they’re free from herbicides.
How Mulch Feeds and Protects Your Soil
Beyond its immediate benefits, organic mulch is a slow-release superfood for your soil. As it gradually breaks down, it adds a steady supply of organic matter, which improves soil structure, aeration, and water retention.
It also provides a habitat and food source for beneficial soil organisms – earthworms, fungi, and bacteria – which are the true workhorses of a healthy garden.
I love seeing the rich, dark soil beneath a layer of old mulch, teeming with life. It’s a clear sign that the soil is happy, healthy, and ready to support another season of abundant growth.
It’s definitely one of those “set it and forget it” tasks that pays dividends all season long.
Testing, Amending, and Balancing Nutrients
You know, for the longest time, I just winged it when it came to adding amendments to my garden. A little bit of this, a little bit of that, based on what I *thought* my plants needed.
But honestly, it was a bit of a guessing game, and sometimes I think I did more harm than good! That’s why I’m now a huge advocate for soil testing. It’s like getting a health check-up for your garden.
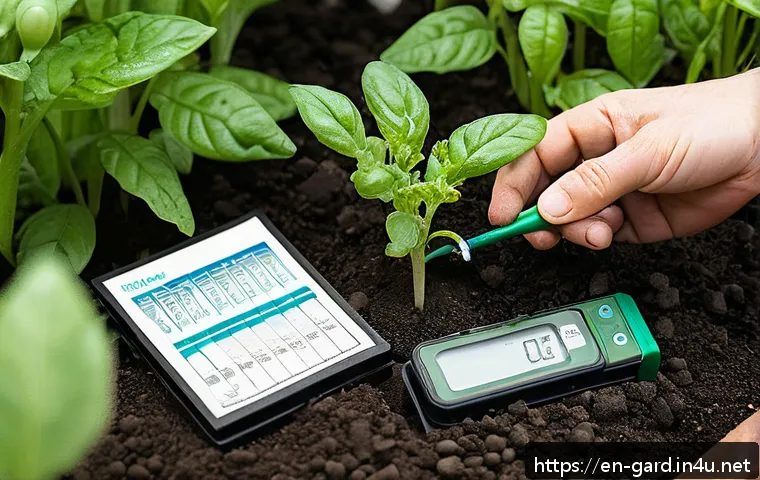
A proper soil test tells you exactly what nutrients your soil is lacking (or has in excess) and, crucially, what its pH level is. Armed with this information, you can make precise and effective amendments, saving money on unnecessary products and ensuring your plants get exactly what they need to thrive.
Understanding Your Soil Test Results
Getting your soil tested is typically easy and inexpensive through your local agricultural extension office or a private lab. They’ll usually provide a detailed report showing levels of nitrogen, phosphorus, potassium, calcium, magnesium, and other micronutrients, along with the all-important pH.
pH is crucial because it dictates how available those nutrients are to your plants. Most vegetables prefer a slightly acidic to neutral pH (6.0 to 7.0).
If your pH is too low (acidic), you might need to add lime. If it’s too high (alkaline), sulfur or organic matter can help bring it down. I learned through a soil test that my garden was surprisingly low in phosphorus, which explained why my fruiting plants weren’t performing their best.
Targeted Amendments for Optimal Growth
Once you know your soil’s specific needs, you can amend it effectively. If you’re low on nitrogen, blood meal, alfalfa meal, or good old compost are excellent organic choices.
For phosphorus, bone meal or rock phosphate work wonders. And for potassium, kelp meal or greensand are fantastic. If your soil needs a general boost in organic matter (which most gardens do!), compost is always the answer.
This targeted approach ensures you’re not just throwing money at the problem but truly building a resilient and fertile foundation for your plants. It’s an investment in your garden’s future that pays off in spades.
| Amendment Type | Primary Benefit | How I Use It (Personal Experience) |
|---|---|---|
| Compost | Improves soil structure, adds broad nutrients, boosts microbial life. | I spread a 2-3 inch layer over all my beds in fall or early spring, lightly incorporating it. |
| Worm Castings | Rich in micronutrients, enhances plant growth, natural pest deterrent. | I add a handful to each planting hole for seedlings and side-dress established plants. |
| Bone Meal | Excellent source of phosphorus, great for root development and flowering. | I mix it into the soil when planting root crops or flowering vegetables like tomatoes and peppers. |
| Blood Meal | High in nitrogen, promotes vigorous leafy growth. | I use it sparingly for hungry greens like kale and lettuce, usually side-dressing. |
| Kelp Meal | Good source of potassium and trace minerals, improves plant stress resistance. | I sprinkle it around fruiting plants or use it as a foliar spray for a quick boost. |
| Greensand | Provides potassium and micronutrients, improves sandy soil water retention. | I incorporate it into sandy areas of my garden to improve fertility over time. |
| Garden Lime | Raises soil pH (makes it less acidic), adds calcium. | Only after a soil test confirms acidic soil; I apply it in fall to give it time to work. |
| Sulfur | Lowers soil pH (makes it more acidic). | Only after a soil test confirms alkaline soil; I apply it cautiously to acid-loving plants. |
Embracing Regenerative Practices: Beyond Just Amending
You know, gardening for me has evolved so much over the years. It started with just wanting to grow some tasty food, but it’s become this incredible journey of understanding and working *with* nature, not against it.
That’s where regenerative gardening practices really come into play. It’s about moving beyond simply amending the soil to actually rebuilding and enhancing the entire soil ecosystem.
These practices are all about minimal disturbance, maximizing soil cover, encouraging biodiversity, and integrating animals (even if it’s just beneficial insects!).
When I adopted these principles, I noticed a profound difference in the resilience of my plants and the overall health of my garden. It’s less about quick fixes and more about long-term ecological balance.
No-Till/No-Dig Gardening
This is probably the biggest shift I’ve made in my gardening journey. For years, I dutifully tilled my garden every spring, thinking I was aerating the soil.
What I didn’t realize was that I was disrupting the incredibly complex web of life beneath the surface – the fungal networks, earthworm tunnels, and microbial communities that are essential for healthy soil.
Switching to a no-till or no-dig approach means I leave the soil structure intact. Instead of digging, I simply layer organic matter (like compost and mulch) on top, letting the earthworms and other creatures do the work of incorporating it.
My soil has never been softer, more alive, or more productive! It took some getting used to, but now I wouldn’t go back.
Encouraging Biodiversity Above and Below Ground
Regenerative gardening is also about celebrating life – all kinds of life! Above ground, that means planting a diverse range of crops, including beneficial insect attractors like marigolds, borage, and cosmos, to create a thriving ecosystem.
Below ground, it’s about feeding the soil microorganisms with constant organic matter, avoiding harsh chemical fertilizers and pesticides, and ensuring there’s always something growing to keep their habitat active.
The healthier and more diverse your soil food web is, the more resilient and productive your garden will be. I’ve found that a bustling, biodiverse garden is a happy garden, humming with life and practically taking care of itself.
글을마치며
And there you have it, fellow gardeners! Our soil is truly the unsung hero of our outdoor spaces, and nurturing it is arguably the most important task we have. I’ve personally learned that investing time and effort into understanding and enriching your soil pays dividends far beyond anything you could imagine – think healthier plants, more bountiful harvests, and a garden that feels vibrant and alive. It’s a journey, not a destination, and every season brings new lessons and deeper connections to the earth beneath our feet. Keep observing, keep learning, and most importantly, keep cherishing that incredible foundation that gives life to everything we grow.
Further Resources for Your Soil Journey
1. Connecting with Your Local Extension Office: Seriously, this is gold! Your local agricultural extension service is an invaluable resource, often offering affordable soil testing, expert advice tailored to your specific climate and soil type, and workshops. I’ve found their personalized recommendations for amendments incredibly helpful, moving me from guessing to genuinely understanding my garden’s needs. Don’t underestimate the power of local expertise; they know the challenges and solutions unique to your area.
2. Diving into Composting: If you haven’t started your compost pile yet, now is absolutely the time! There are tons of online guides and community workshops that make starting simple. My biggest takeaway from years of composting is to keep it diverse – a good mix of kitchen scraps, yard waste, and even shredded paper makes the richest “black gold.” It’s incredibly satisfying to turn waste into a powerhouse for your garden, and it’s a huge step towards sustainability, reducing landfill waste significantly.
3. Exploring Cover Crop Varieties: Don’t just pick any cover crop; research what works best for your specific gardening goals and local climate. Are you trying to fix nitrogen, break up hardpan, or just add organic matter? I often spend an evening with a cup of tea, browsing seed catalogs for new varieties to try. Consider different blends too; a mix of legumes and grasses can provide multifaceted benefits, really giving your soil a comprehensive boost over the winter months. It’s a commitment, but the payoff is immense!
4. Embracing No-Till Methods: If you’re currently tilling, I urge you to look into no-till or no-dig gardening. It might feel counterintuitive at first, but leaving the soil structure undisturbed fosters an incredibly healthy ecosystem beneath the surface. I started with just one no-till bed, and after seeing the improvement in soil texture and plant health, I gradually converted my entire garden. It saves labor, improves water retention, and cultivates a thriving microbial community that literally does the heavy lifting for you.
5. Becoming a Soil Observer: The best thing you can do for your garden is to simply pay attention. How does the soil feel? Does it smell earthy and rich? How quickly does it drain after a rain? These observations, combined with periodic soil tests, will tell you more about your soil’s health than any textbook ever could. I keep a garden journal to note these things, and it helps me track changes and respond to my soil’s evolving needs throughout the seasons. Your soil is alive, and it will tell you what it needs if you just listen!
Nourishing Your Garden: Essential Reminders
Okay, let’s bring it all together, because truly, a healthy garden starts from the ground up. I’ve learned through years of dirt under my fingernails that our soil isn’t just inert dirt; it’s a vibrant, living ecosystem that needs our care and attention. Remember, every harvest is a withdrawal, so we absolutely must make deposits back into that soil bank. Think of compost as your primary currency – it’s literally liquid gold, enriching everything it touches with diverse nutrients and vital organic matter. I make sure to replenish my beds with a generous layer every season, and it makes all the difference. Neglecting this step is like trying to run on fumes, and your plants will definitely let you know!
Then, consider cover crops your garden’s protective blanket. They’re not just pretty green things; they’re actively preventing erosion, suppressing weeds, and silently building fertility, especially those amazing nitrogen fixers. I used to leave my beds bare, and honestly, it felt like I was abandoning them! Now, I see them as an essential part of the cycle, preparing the soil for its next big act. And please, don’t forget the wisdom of crop rotation. It’s a simple strategy that dramatically reduces pest and disease pressure while ensuring your soil’s nutrients are used efficiently. I used to be a creature of habit, planting tomatoes in the same spot, but diversifying has saved me so many headaches. It’s all about playing the long game for a thriving, resilient garden.
Finally, embrace the power of observation and soil testing. You wouldn’t guess at your own health needs, so why guess with your soil? A soil test is your garden’s annual check-up, giving you the precise data needed to make targeted amendments. This knowledge has saved me money on unnecessary products and focused my efforts where they truly count. And lastly, remember that regenerative practices like no-till gardening and fostering biodiversity are not just trends; they’re the future of sustainable, abundant gardening. They’ve personally transformed my garden into a self-sufficient, thriving oasis. By working *with* nature, we create not just a garden, but a living legacy.
Frequently Asked Questions (FAQ) 📖
Q: What’s the absolute best way to start replenishing my garden soil after a big harvest, especially if it feels totally worn out?
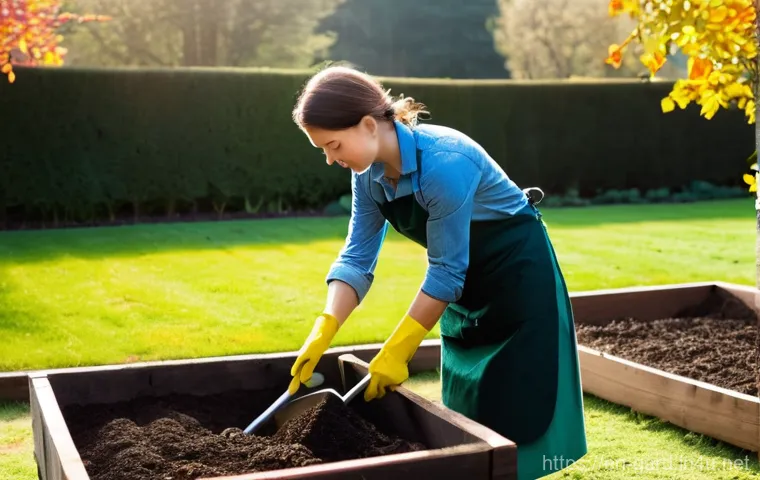
A: Oh, I totally get that feeling – staring at those empty beds and wondering where to even begin! From my own experience, the most impactful first step is adding a generous layer of high-quality compost.
Think of it as giving your soil a superfood smoothie! Compost is teeming with beneficial microbes and essential nutrients that your hardworking plants have used up throughout the season.
When I first started gardening, I didn’t realize how much my soil was giving, and how little I was giving back. Now, I aim for at least a 1-3 inch layer across all my beds.
You can gently fork it into the top few inches if you like, but honestly, the worms and other soil critters will do an amazing job mixing it in for you.
This “top dressing” method is fantastic because it minimizes disturbance to the soil’s intricate structure, which is a big win for regenerative practices.
This step alone will kickstart the regeneration process, improve soil structure, and enhance its ability to retain both water and nutrients. It’s like pressing a reset button for your garden’s health!
Q: Besides compost, are there other simple, natural things I can add to give my soil an extra boost? I’m trying to avoid synthetic fertilizers.
A: Absolutely! I’m a huge advocate for working with nature, not against it, so ditching those synthetic fertilizers is a fantastic goal. After a season of heavy feeders like tomatoes and peppers, your soil definitely appreciates some extra love.
One of my favorite, almost magical, additions is aged manure. I’ve seen incredible results from adding well-composted horse, cow, or even chicken manure.
It’s packed with nutrients and supercharges the organic matter in your soil. Just make sure it’s aged and not fresh, as fresh manure can burn your plants – a lesson I learned the hard way once!
Another game-changer, especially for long-term soil health, is planting cover crops like clover or winter rye. I usually sow them in late fall. They protect the soil from erosion, suppress weeds, and then, when you gently turn them under in the spring, they add a fantastic amount of organic matter and nitrogen back into the soil.
It’s like a green blanket for your garden that gives back twice over!
Q: I’m trying to move towards a more sustainable, regenerative garden. What are some long-term practices I should adopt to keep my soil healthy year after year, preventing future depletion?
A: That’s an awesome goal, and one I’m deeply passionate about! Moving towards regenerative gardening is all about nurturing your soil as a living ecosystem, not just dirt.
Beyond compost and cover crops, I’ve found a few practices truly make a difference in the long run. First, embrace a “no-till” or “minimal disturbance” approach.
I used to think tilling was necessary, but it actually disrupts the delicate fungal networks and microbial life in the soil that are crucial for plant health.
Instead, I now just add layers of organic matter on top, letting nature do the mixing. Second, always aim to keep your soil covered. Bare soil is vulnerable!
Use mulches like straw, shredded leaves, or wood chips. Not only do they suppress weeds and retain moisture, but as they break down, they continuously feed your soil a steady diet of organic matter.
This builds a robust, self-sustaining soil ecosystem that will reward you with vibrant, healthy plants and abundant harvests for years to come. It truly transforms your gardening experience, making it less work and more joy!